
4 Proven Tips to Do Gua Sha Effectively at Home
Are you eager to harness the beauty and wellness benefits of Gua Sha? In one of our recent blogs, we delved into the incredible benefits of this ancient practice. Now, it’s time to put that knowledge into action and learn how to do Gua Sha safely and effectively at home. This transformative journey is not just about improving your skin’s radiance and promoting relaxation; it’s also about empowerment and self-care. So, let’s dive right in and discover how to unlock the full potential of Gua Sha right in your own space.
4 TIPS: HOW TO DO GUA SHA AT HOME
Gua Sha is fantastic, but just like anything, you might run into issues if you don’t do it right. Here are 4 essential tips to remember to make the most out of your Gua Sha practice.

Tip #1: CHOOSE THE RIGHT TOOL.
You wouldn’t try to fix your car without the right tools and some knowledge, right? The same goes for Gua Sha. Safety is your ticket to enjoying all those amazing benefits without any regrets.
Using random objects is a no-go. You need legit Gua Sha tools, and you need to know how to use them correctly. So, let’s do this right, shall we?
Gua sha tools come in various shapes and materials, from traditional bone and horn to more contemporary instruments. Surprisingly, some resourceful practitioners even use everyday items like Chinese soup spoons or the lid of a glass jar.
Currently, the trending choices are jade and rose quartz. With its serene and pure aura, jade is believed to promote fertility, balance, and deep healing. On the other hand, rose quartz is known as the stone of universal love, fostering harmony deep within the heart and encouraging unconditional love and compassion.
When choosing your Gua Sha tool, hold the tool in your hand if possible. Feel its energy and weight. Notice which one draws you in—perhaps it sparkles a bit more or feels just right.
Consider the size and shape of the tool as well. Smaller devices are great for delicate facial areas, while larger ones are suitable for the body. Round edges are generally gentler on the skin. For tougher skin, a more angled tool might be your jam.
Additionally, be cautious of counterfeit products. Ensure that you’re purchasing your Gua Sha tool from a reputable source to experience the full benefits of this practice.
Tip #2: PREP YOUR SKIN.
Now that you’ve chosen your trusty Gua Sha tool, it’s time to get your skin prepped and primed for this rejuvenating ritual. Think of it as a little pampering session for yourself.
Here’s how to do it right:
Step 1: Cleanse your skin.
The first order of business is cleanliness. Grab a gentle cleanser and wash your face and neck thoroughly. Nobody wants to Gua Sha over dirt and grime, right? A clean canvas is vital to the whole process.
Step 2: Pat dry.
After your cleansing session, pat your skin dry with a clean towel. Keep it gentle; don’t rub! We’re aiming for love and care, not a wrestling match.
Step 3: Hydration time!
Now, treat your skin to a refreshing hydrating mist or toner. It’s like giving your skin a big drink of water. Your skin will thank you later for this extra boost of moisture. Hydrated skin is happy skin!
Step 4: Lubricate well.
Here’s the secret sauce to a smooth Gua Sha experience – apply a suitable oil or serum. This helps the Gua Sha tool glide effortlessly and also prevents irritation.
Tip #3: MASTER THE ART OF GUA SHA.
Time to get hands-on with Gua Sha! As you gently glide your Gua Sha tool, you might sense the subtle movement of fluids beneath your skin. It’s a positive sign that your skin is responding to this ancient ritual, leaving you feeling refreshed and radiant.
Now, here’s how you can do it right:
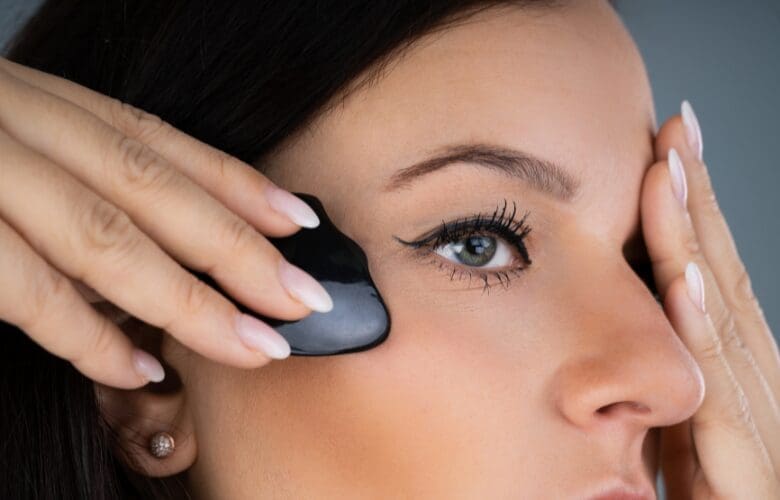
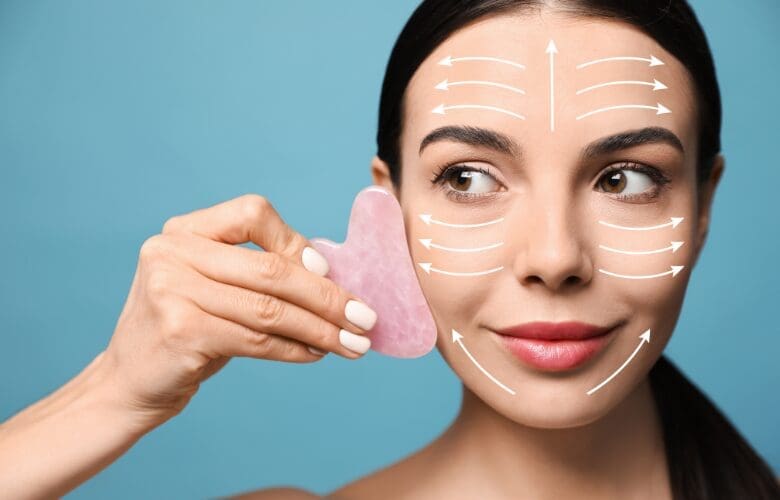
1. For the Face:
- Start from the center and gently stroke outwards. Think of it as a mini facelift!
- Sweep from the middle of your chin over your jawline towards your earlobe. Add a little jiggle at your ear to encourage fluid drainage to the lymph nodes.
- Continue with a sweep over your cheekbones, finishing gracefully at the hairline.
- Be delicate as you sweep under your eyes, following the natural flow from the corner of the eye towards the midline.
- Glide your tool over your eyebrows, moving towards the hairline and up the brow bone.
- Complete your facial symphony by sweeping from the middle of your forehead to your hairline.
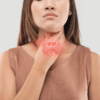
2. Neck and Shoulders:
- Stroke downwards from your jawline to your collarbone.
- Gently sweep from the base of your neck towards the outer edge of your shoulders.
3. Back and Body:
- Go with the grain of your muscles, not against it.
- Use broader strokes, but still, keep it gentle and controlled.
Tip #4: FIND THE RIGHT BEAT.
When it comes to Gua Sha, it’s all about finding the right tempo for your skin and muscles. If you’re just starting out, ease into it with shorter sessions of 5-10 minutes.
Begin with a gentle frequency of 2-3 times a week to allow your skin and muscles time to adapt. As you become more comfortable, you can gradually increase the duration to 15-20 minutes, but remember, slow and steady wins the race.
However, always be in tune with your body’s cues – it’s the boss of this operation. If it signals, “Hey, that’s enough for today,” then it’s time to stop. Your skin and muscles need their recovery time. Take it easy to enjoy the ride fully!
7 COMMON MISTAKES TO AVOID
Now that you’ve embarked on your Gua Sha journey, it’s important to navigate it smoothly by steering clear of some common pitfalls. Here’s how to ensure you get the most out of your Gua Sha practice while avoiding these mistakes.
- Too much pressure: Pushing too hard can lead to bruises or skin irritation. Easy does it, friend. Gentle pressure is the key.
- Wrong direction: Going against the grain of your muscles can be a no-no. Follow the natural lines of your body.
- Skipping prep: Be sure to complete the skin prep! Clean, hydrate, and use that slick serum for a smooth glide.
- Rushing it: Slow down! Gua Sha is a zen moment, not a race. Take your time and enjoy the process.
- Overdoing it: Limit each stroke to 3-10 times per area. Excessive sweeping can lead to overstimulation, potentially triggering detox symptoms like dizziness or flu-like feelings.
- Sharing tools: Your Gua Sha tool is personal. Sharing can spread bacteria, so keep it to yourself.
- Inconsistency. Just as you maintain your overall well-being with consistent habits, regular Gua Sha is essential for optimal benefits. Aim for a steady routine to reap the rewards of this ancient art.
HOW DOES A GUA SHA SESSION SHOULD FEEL LIKE?
Gliding the tool across your skin should not be abrasive or painful; instead, it’s a sensation of gentle pressure, like the soft caress of a breeze. You might feel the tension within your muscles gradually releasing as the tool works its magic.
Intuitively adjusts the pressure, addressing knots and blockages with care. The strokes are rhythmic, like a soothing melody, promoting blood circulation and the stagnant energy flow. You’re enveloped in a sense of deep relaxation, and any worries or stress melt away.
Overall, Gua Sha is a personalized self-care journey where you can pause, explore, and savor every stroke. The sensation is still one of soothing relief, and the effects on your skin and well-being are equally profound.
The Bottom Line
Doing Gua Sha effectively is within your reach! With the right tools and techniques, you’re on your way to reaping the rewards of this ancient practice. So, go on, indulge in some self-love; your skin and muscles will thank you. But we understand life can get busy, and you might not always have the energy for a DIY session. That’s why we’re here for you. When you need that extra touch of pampering or guidance, don’t hesitate to reach out to us. We’re dedicated to helping you glow inside and out!